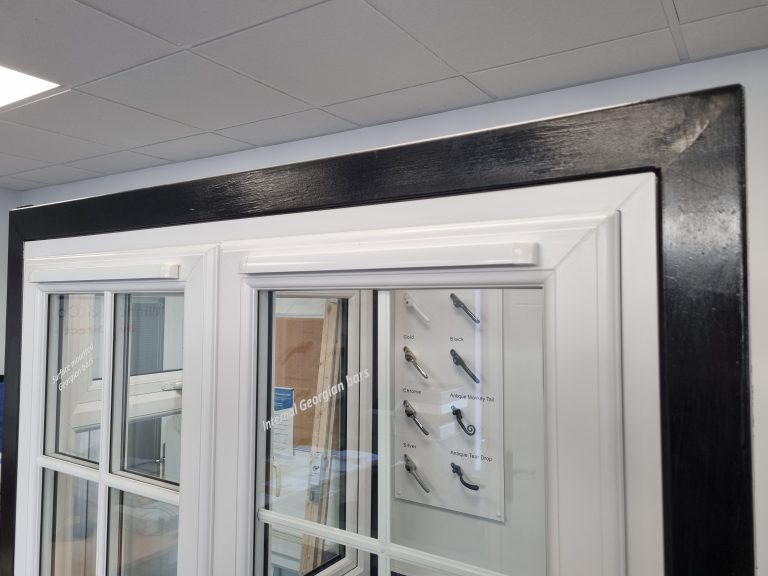
Trickle vents play a crucial role in maintaining a well-ventilated and condensation-free home. If you have existing uPVC windows and want to enhance ventilation by installing trickle vents, this guide will walk you through the process. Trickle vents can be retrofitted to uPVC windows with a bit of careful planning and the right tools. Follow the step-by-step instructions below to successfully fit trickle vents to your existing uPVC windows.
Here’s how to fit trickle vents to existing uPVC windows:
1. Gather the necessary tools and materials:
- Trickle vents: Choose the appropriate size and style of trickle vents suitable for uPVC windows.
- High-speed metal drill bit: Required for drilling holes in uPVC frames.
- Masking tape or duct tape: Used to mark drill bit depth and protect the window frame.
- Screwdriver: To secure the trickle vents in place.
- Measuring tape or ruler: For accurate measurements.
- Pencil or marker: To mark the drilling points.
2. Measure and mark the installation points:
- Start by determining the ideal location for the trickle vents on your uPVC window frame. Typically, they are installed near the top of the window.
- Measure and mark the central point for each trickle vent on both the inside and outside surface of the window frame. This will ensure proper alignment during installation.
3. Prepare for drilling
- Attach a small piece of masking tape or duct tape around the drill bit, marking the desired depth. This prevents drilling too deep and damaging the window frame.
- Double-check the measurements and alignment of the marked points before proceeding.
4. Drill the holes
- Select the appropriate high-speed metal drill bit suitable for uPVC frames.
- Begin drilling a pilot hole from the inside of the frame at each marked point, ensuring that the drill is perpendicular to the frame.
- Repeat the drilling process from the outside of the frame, ensuring that the holes meet with the pilot holes.
5. Clean and smooth the holes:
- After drilling, use a soft cloth or sandpaper to remove any rough edges or burrs around the holes.
- Ensure the holes are clean and free from debris before proceeding to the next step.
6. Install the trickle vents:
- Take the trickle vents and align them with the drilled holes.
- Insert the screws provided with the trickle vents through the holes in the vents and into the uPVC frame.
- Securely tighten the screws to firmly fix the trickle vents in place.
- Double-check the alignment and stability of the installed trickle vents.
7. Test and adjust
- Open and close the trickle vents to ensure they operate smoothly.
- Verify that the vents allow the desired amount of airflow while maintaining security.
- Make any necessary adjustments or tightening of the screws, if needed.
Conclusion
Installing trickle vents to existing uPVC windows is a practical way to improve ventilation and reduce condensation within your home. By following this step-by-step guide, you can successfully fit trickle vents to your uPVC windows, enhancing airflow and maintaining a healthy living environment. Remember to choose the right size and style of trickle vents and exercise caution while drilling to avoid any damage to the window frames. Enjoy the benefits of improved ventilation and a more comfortable living space.
FAQs
Can I install trickle vents on my existing uPVC windows?
Yes, it is possible to install trickle vents on existing uPVC windows. You will need to drill holes in the window frame to accommodate the vents.
What tools do I need to fit trickle vents to uPVC windows?
To fit trickle vents, you will need the following tools: high-speed metal drill bit (for uPVC frames), masking tape or duct tape, screwdriver, measuring tape or ruler, and a pencil or marker.
How do I determine the placement of the trickle vents on my uPVC windows?
Trickle vents are typically installed near the top of the window frame. You can mark the central point on both the inside and outside surfaces of the frame for accurate alignment during installation.
Do I need to replace my windows to install trickle vents?
No, you do not need to replace your windows to install trickle vents. Trickle vents can be retrofitted to existing uPVC windows by drilling holes in the frame and securing the vents in place.
Can I install trickle vents myself, or do I need professional help?
You can install trickle vents yourself if you have the necessary tools and feel comfortable with the installation process. However, if you are unsure or prefer professional assistance, it is recommended to hire a qualified installer.
Are there any size requirements for the trickle vents on uPVC windows?
The size requirements for trickle vents may vary depending on building regulations and the specific window type. It is important to choose trickle vents that meet the minimum requirements for background ventilation in your area. Consult with a professional or refer to local guidelines for specific size recommendations.

